How to Plunge a Sink Drain
 It’s inevitable for particles of food, hair, soap and other debris to collect in your drains at home. You might not notice at first, but water begins to drain at a slower pace and eventually, standing water accumulates in the shower or sink basin.
The blockage generally occurs in the trap, the U-shaped pipe located directly below the sink basin. In this case, plunging the sink drain can get water flowing again.
Preparing the Drain
Based on the degree of blockage:
- You may want to start by flushing the drain with hot water, which can loosen debris, soap and food residue, followed by one cup each of baking soda and vinegar. This step is not recommended if water has already started to accumulate in the sink.
- Avoid using drain cleaner, especially if there’s already water in the basin. This chemical solution won’t break down the clog and can damage your pipes and sink in the process.
- Start with the stopper, an area where hair and soap frequently accumulate. Remove this part to clear away any debris, then check to see how well water flows down the drain.
Plunging the Drain
The plunger you use should create a firm seal around the drain. The size you have for the toilet may be too large for the kitchen or bathroom sink, so make sure to get a smaller or sink-specific model.
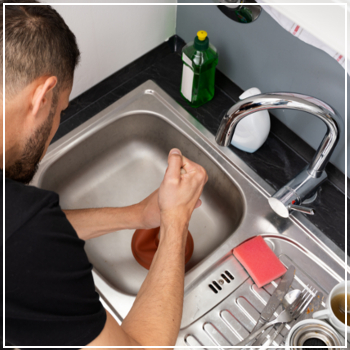
The suction and compression of plunging pulls water in the drain up, before forcing it down with any debris. Repeating this motion can break up the clog and cause debris in the trap to flow toward the sewer. For this to be effective, there should be a small amount of water in the basin.
To plunge your sink drain:
- Remove the stopper or any covering over the drain.
- Temporarily close or block the overflow opening, so there’s no impact on the amount of force created. Your sink or tub may have multiple openings, which should all be plugged for this process.
- With the overflow closed, add about one inch of water to the basin.
- Place the plunger over the drain and create a firm seal around the edge.
- Move the plunger handle up and down in an even motion for at least 15 seconds. Make sure you don’t break the seal.
- Lift the plunger to see if the water in the basin slows down. If the water doesn’t move or only partially drains, continue plunging until the clog feels like it has loosened and you need to apply less force to move the plunger.
- Once the basin clears, run hot water down the drain to dissolve and wash away any remaining debris.
If the clog doesn’t appear to budge, you may need to snake the drain. In this case, insert the drain snake or auger until it finds the source of the clog and rotate to break it up. Yet don’t force it into the drain, as this can scratch or damage your pipes. As a last resort before you contact a plumber, you may need to remove the trap to physically remove the clog.
When plunging and snaking your sink:
- Never plunge after you’ve added a drain cleaner, as the solution can splash and result in chemical burns to your skin and eyes.
- Don’t use a high degree of force to plunge, as this can damage the trap and drain line connection.
- Avoid using any tool that applies significant force, like a drain bladder, as these can crack sink components and lead to leaks.
Preventing a Clogged Sink
To keep the drains in your home flowing freely:
- Keep any hair from flowing down the drain
- Routinely clean hair and soap from the stopper
- Add a strainer or grate over the drain to catch debris
- Regularly flush your drain with hot water, followed by vinegar and baking soda
Is your sink still clogged after plunging and snaking? Have our plumbers inspect the drain. To schedule service, contact MJ Fahy & Sons today.